Culling is time-consuming, tedious, and, a lot of the time, just not fun. After many weddings and portrait sessions, I needed a way to cull photos faster and make the process more exciting (thanks, ADHD). Here is exactly how I cull my images two times faster than I used to on my MacBook Pro.
When I first heard the term culling just a few years into my business, I had no idea what it meant. Culling is just pruning out the bad photos and selecting the good ones. After all, who uses every photo they take? It’s always good to have options.
For reference, here are my computer specs (although this basic setup should work with any computer, apps may vary.):
- 16″ MacbookPro
- Apple M1 Max
- 64GB Memory
- Ventura
Fast RAW-Reading Application
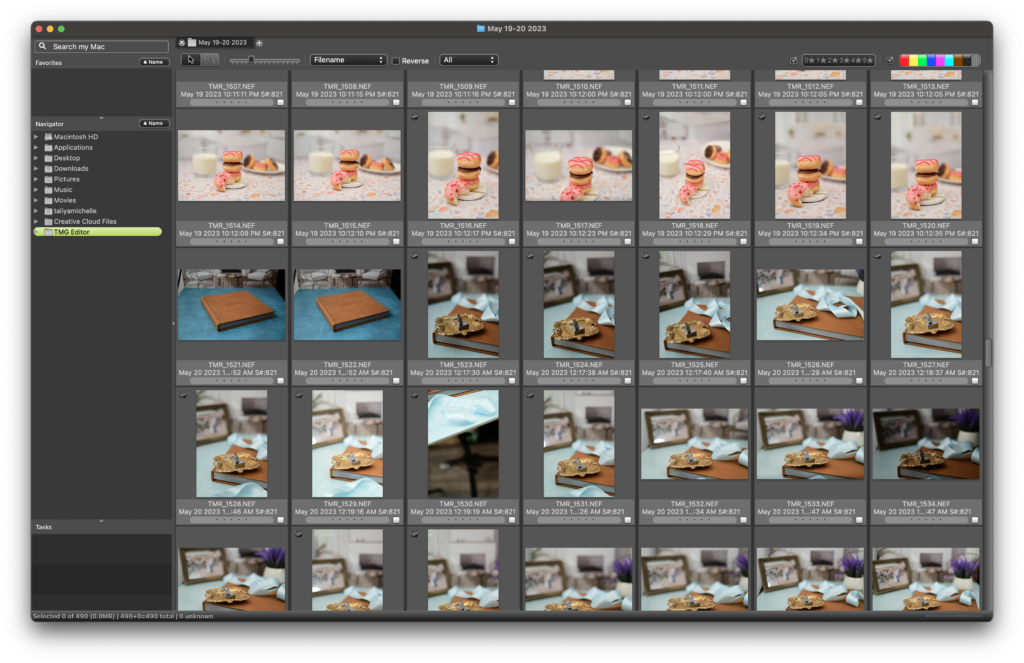
The most important thing is to have an application that reads RAW images very fast. There are a bunch of awesome apps out there, but I prefer Photo Mechanic. When I redesigned my business in 2018, the app Photo Mechanic was talked about a lot among educators. I gave it a try and found it was perfect. Already, I could see my culling time reduced because Photo Mechanic reads RAWs faster than Lightroom. Some people use Bridge, and others cull within Lightroom, but I have always found the RAW images load too slowly.
I use Photo Mechanic 6 currently, and there is another version called Photo Mechanic Pro, but I haven’t tried it. Speaking of trying, you can try Photo Mechanic free for 30 days. Test it out, and let me know what you think! Photo Mechanic works for both Mac and Windows. See the site for specific system requirements. While a great RAW-reading application is important, I use a few more tools to cull even faster.
A Video Game Controller
If you know me, then you know that I love video games. Someone mentioned it to me before, and I thought, why don’t I try that? I use a PS3 or a PS4 controller and hook it up to my MacBook. My PS4 controller is technically wireless, so I just use the charging cable. Since I have a newer MacBook, I only have USB-C ports, and I use the original cables for both controllers, so they are Micro USB to USB. You could try a USB-Micro to USB-C cable; otherwise, you’ll need a converter. Most of the time, I use a dedicated wired off-brand controller for convenience.
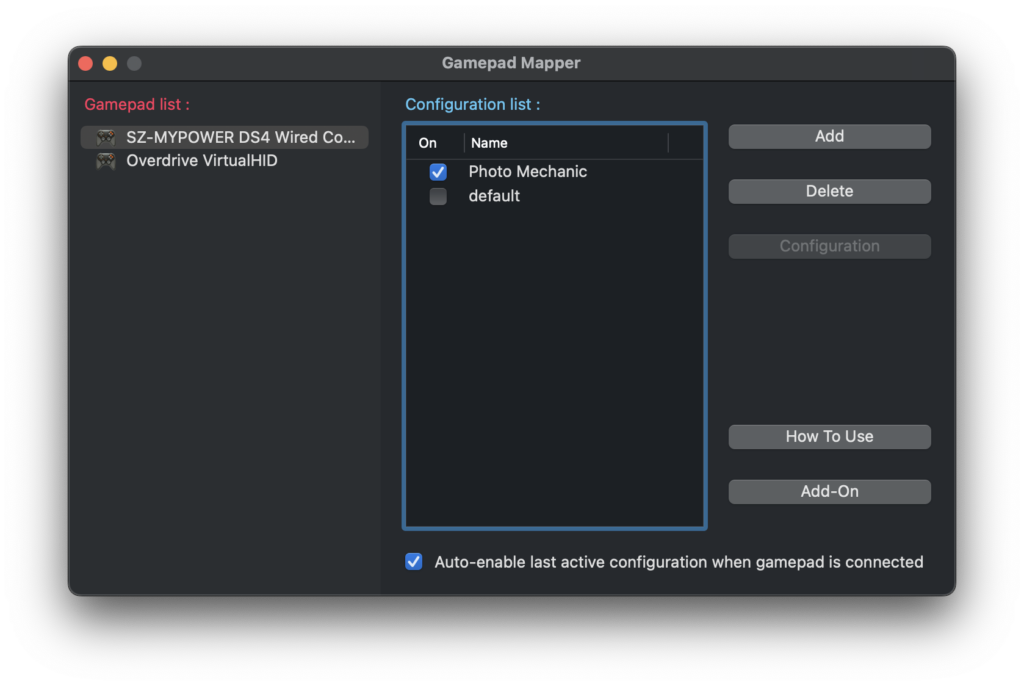
Now, at least for MacBook Pros, plugging in a game controller isn’t just going to magically work. You’ll have to program your controller to your preferences for Photo Mechanic. I used to use USB Overdrive, but it no longer works for the most recent operating system. So now I use Gamepad Mapper, available right in the App Store for $5.99.
A Way to Map The Controller
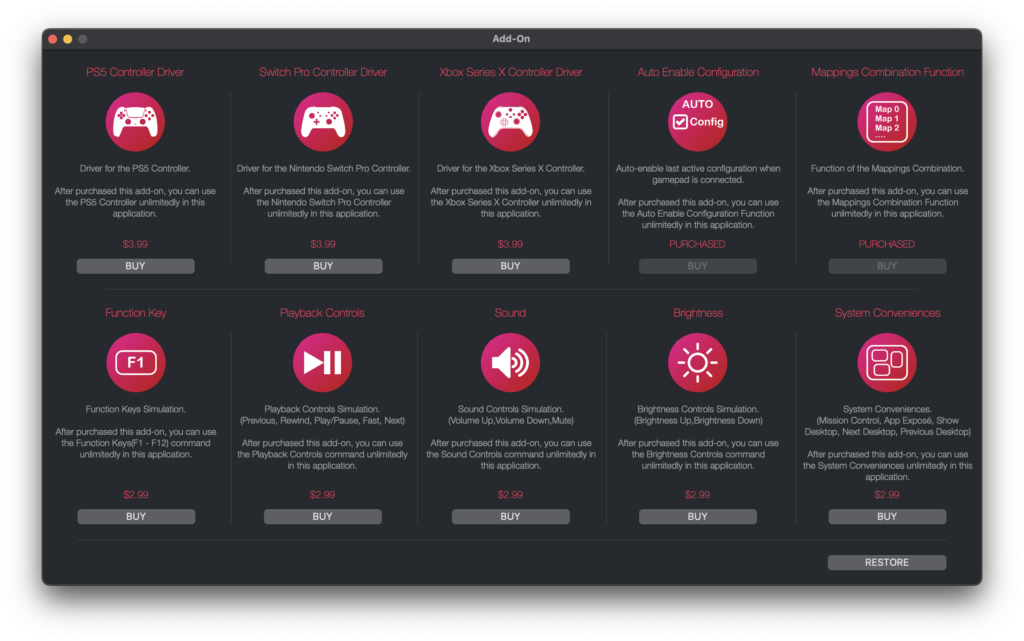
Forwarning, there are some add-on purchases available. You may also need to purchase the Mappings Combination Function and optional Auto-Enable Configuration.
The Mappings Combination Function is so you can configure the buttons to trigger multiple keys. Auto Enable Configuration just remembers which active configuration you used last when you closed the app, so it’s ready for you when you open it again. Not necessary, but I found it convenient since this is all I use it for. You can purchase these from the Add-On button in the lower right corner of the main screen.
There is no one right way to map your controller. If you’re a fellow gamer, this may not even need explaining, but if not, stick with me. When you plug in your controller to your computer, it should show up in the Gamepad list in the left-hand column. It will have a default option, and that’s the one that I changed in my settings. You can also Add or Delete another configuration.
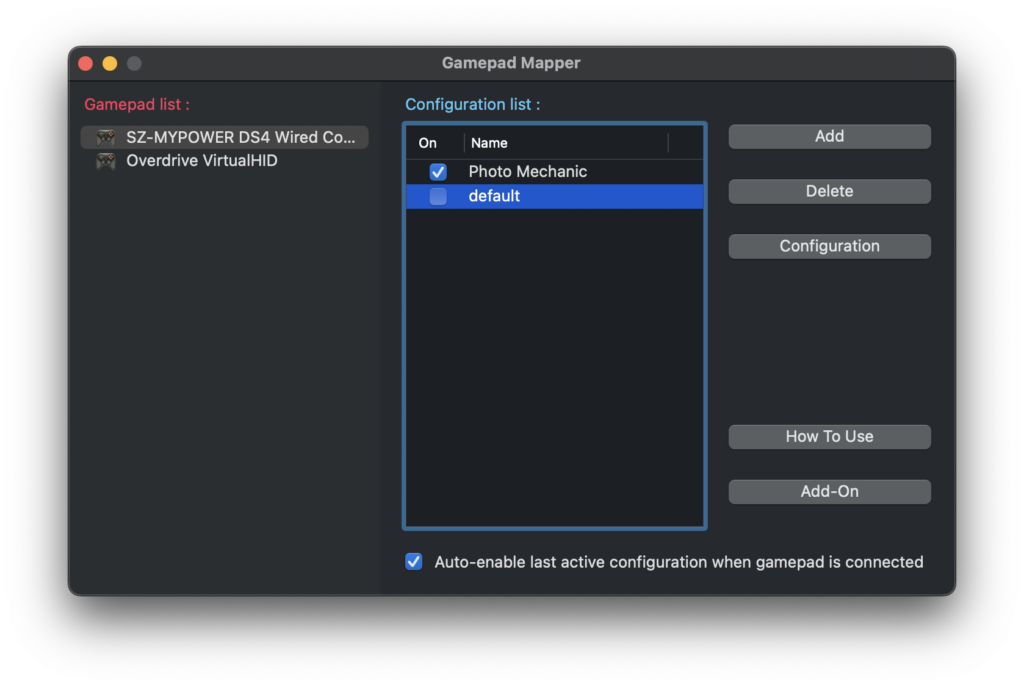
Click Add or select default from the list (double click to change the configuration name) and click Configuration. Then you’ll see this screen:
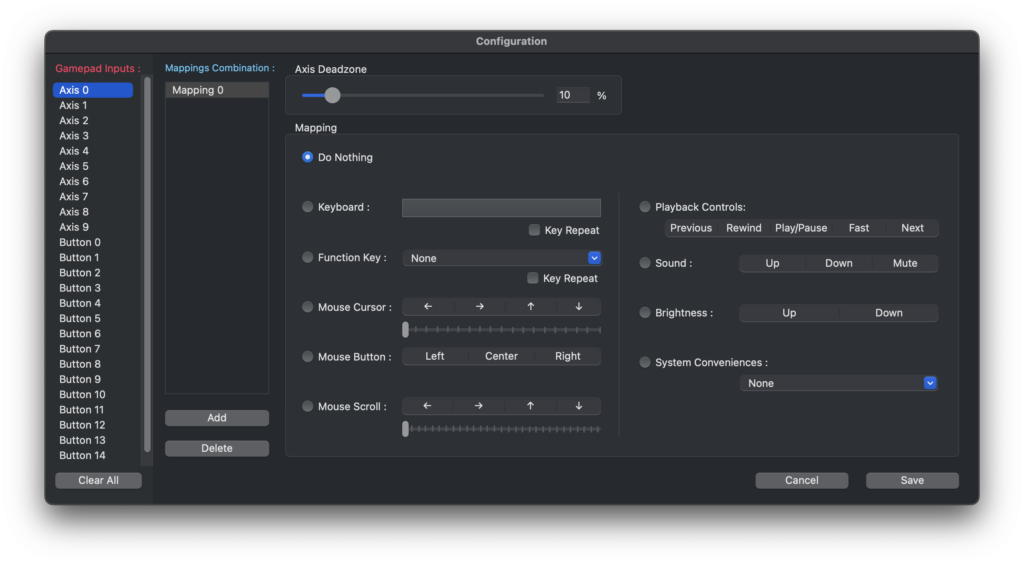
This is where you will map your buttons. When you press keys on your controller, you’ll notice that it automatically goes to the input connected to that button. Since I am a gamer, I use the buttons that are most natural to me: X, Circle, Triangle, R2, and L2. That’s it!
After you have pressed the button you’d like to map, make sure to assign the correct key command. You can double-check by using the drop-down menu in Photo Mechanic and seeing the key commands on the right-hand side. You will need the Mappings Combination Function add-on if you need more than one mapping, such as ‘⌘’ + ‘1’, to label your photo red. At the bottom of Mappings Combinations, click Add to include another key combined with Mapping 0. Repeat this step for each button you need to map.
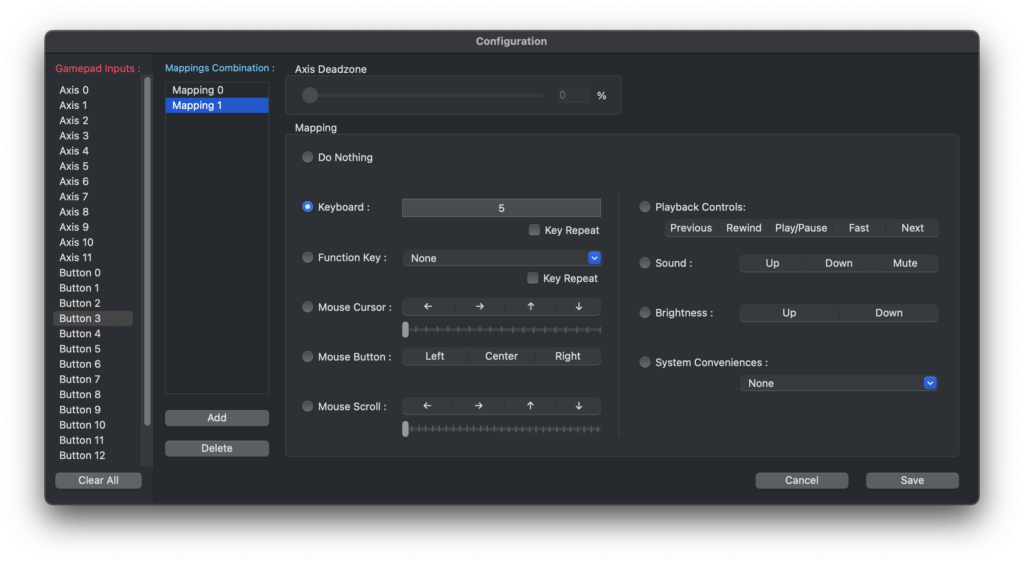
As I mentioned before, there is no one right way to map. Do what works best for you. These are the settings that I use mapped to my preferred buttons:
- Previous Photo – Left Arrow | L2 (Left Trigger)
- Next Photo – Right Arrow | R2 (Right Trigger)
- 1 Star Rating – control^ + 1 | X
- 0 Star Rating – control^ + 0 | Circle
- 5 Star Rating – control^ + 5 | Triangle
When you’re done mapping your buttons, click save. You will return to the main window. Always make sure that this configuration is checked on to work.
Putting it all together:
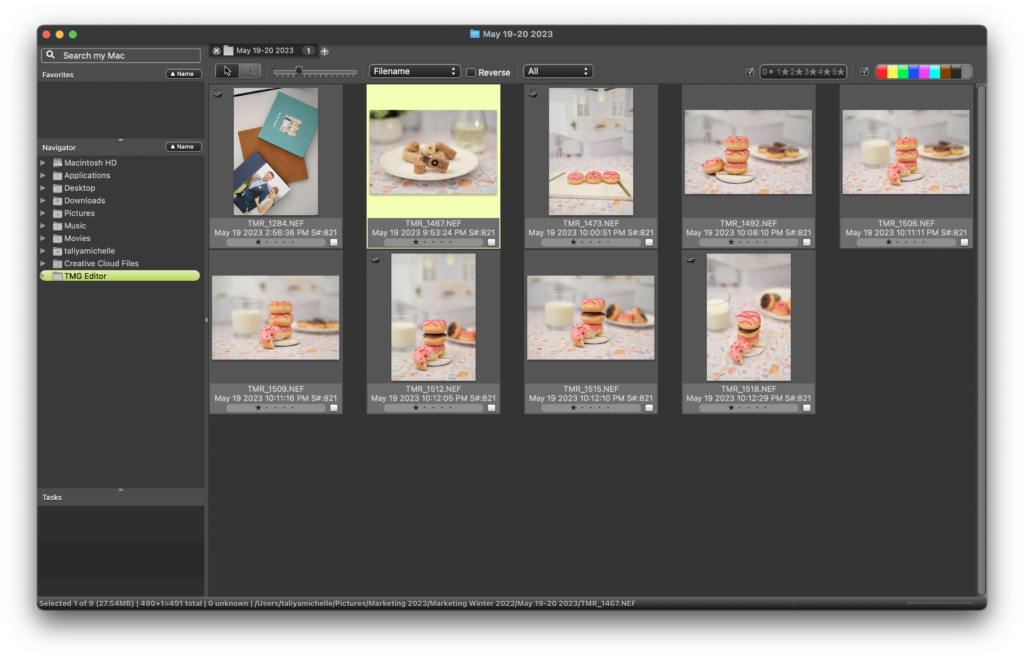
Once you have finished setting up, it’s time to cull. Now, you will need to keep GameMapper open so that the configuration is active. Open up Photo Mechanic and select a contact sheet, or folder of RAW images, to cull. The blank window should now be filled with all the images in the folder, as in Fig. 1.
You can cull it all in the main screen, but I like to double-click an image (any image in the folder) and enlarge the photo in the window pictured below. I always start with the most recent photo and go backward, giving my left hand something to do. It creates a balance, so it feels just like I am gaming.
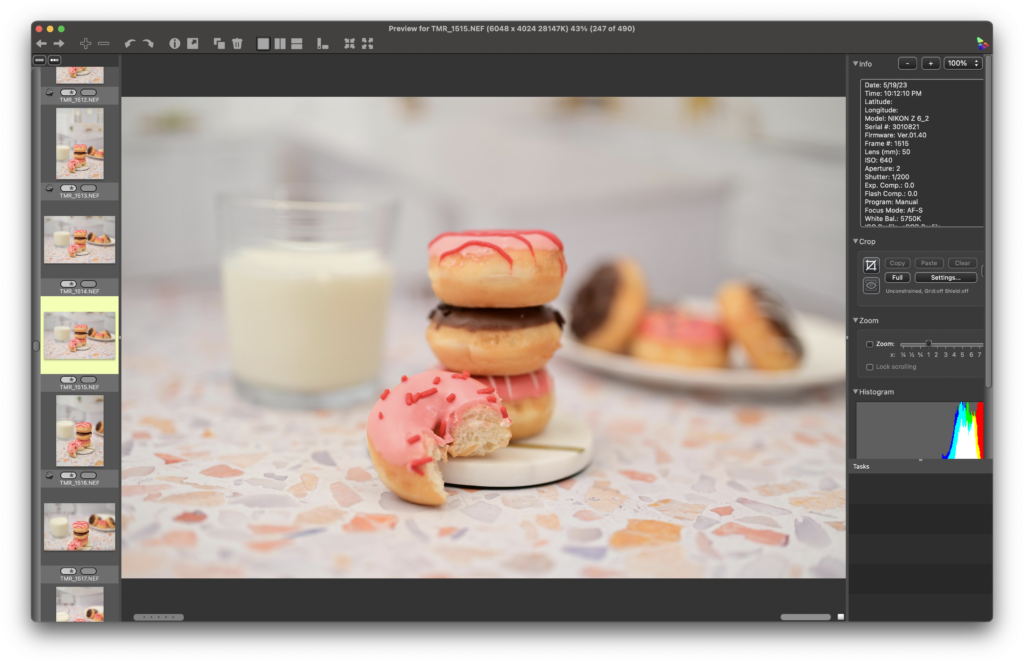
After that, I close out the window and return to the main contact sheet. I deselect all images with a zero star rating (1 for selected and 5 for sneak peeks), and I am left with only the starred images. I select all of those and drag them into a new folder on my external hard drive. And next, editing begins.
Try this method out, and let me know if it works for you. It’s not a one-size-fits-all solution, but I know it has cut my culling time in half. When I return from a wedding, I cull immediately and usually finish it all in about 1.5 hours, and about 2 hours if I have a second that uses two cameras.
When I cull, I cull my biggest, main card first, then my second card, and then I will do my second photographer’s images. I will cull their biggest card, then their smallest because when I have my day’s selected images in mind, it’s easier to pick the additional images that I need.
Photo Culling Toolkit Recap:
- Photo Mechanic app ($169.00)
- Gaming controller with wired hookup (≈$20.00)
- GamepadMapper app ($5.99)
- Bonus: USB-C to USB converter (≈$5.99-19.99)
Happy Culling!
Note: I have tried Aftershoot, but I did not like it, personally. It took me several hours longer to cull because it did not cull how I wanted. Maybe someday it could work, but I am very happy with how I cull now. I usually get a fair amount of wedding sneak peeks on social within 24 hours. Plus, all of the pieces in my toolkit are a one-time purchase, and no monthly subscription is required.
TM Grey Photo is a Wedding and Portrait Photographer and a Private Editor in the New Jersey area. TM Grey Photo focuses on bright and bold stories and genuine smiles. Check out more weddings, portraits, and engagements in the gallery. Want TM Grey Photo to tell your story? Let’s chat.
Did you find this blog helpful? Check out these, too:
10 Things I Wish I Knew Before I Started My Business
Your Friendly Neighborhood Photo Editor
Related
Aug 29, 2023
How I Cull Photos Two Times Faster
If you're new here, then let me welcome you to my blog! Taliya Michelle, here, owner of TM Grey Photo & TM Grey Events. I am a New Jersey based Wedding & Portrait Photographer and a certified Wedding & Event Planner. I of course, serve New Jersey couples, but I travel to Connecticut, New York, Eastern Pennsylvania, and wherever happy couples need their love stories told.
This is a place where I can journal about my lovely clients, what's going in my world, and of course give tips to all the future spouses and wedding vendors alike. Be sure to check my Instagram for the latest!
Hey Friend!
categories
Leave a Reply Cancel reply
You must be logged in to post a comment.
The Latest at TM Grey Photo & Events
All the latest TM Grey, including blogs on recent sessions and engagement and wedding planning, as well as updates, sales, discounts, behind-the-scenes with Taliya, and special model call sessions.
@tmgreyphoto
LET'S BE FRIENDS ON INSTAGRAM